My nephew Lennon turns one next week, so I thought it would be nice to make him a gift rather than buy him something from the store. I’m the kind of maker who likes to have a solid end goal to learn new things so I felt that creating a pull behind duck toy would be a great way to learn how to use different parts of the woodshop, refresh my memory on the laser cutter, and win at being an aunt.
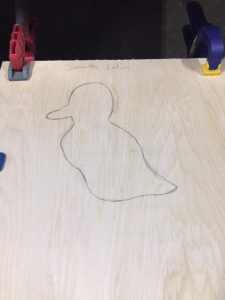
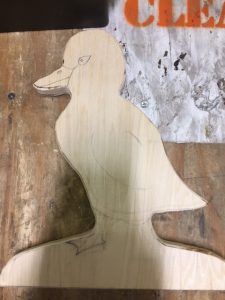
I wanted this toy to have some heft and not feel like a small human could break it within minutes of playing, so I started by gluing two pieces of ½” plywood together and clamping it overnight. When it was dry, I started to draw the silhouette of the duckling in pencil.
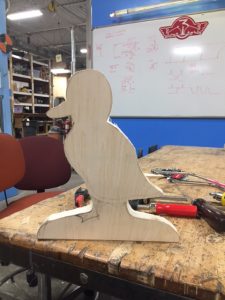
After being trained on the bandsaw and getting comfortable, I began to cut out my duck silhouette. As I approached the more delicate curves I knew that my skill level wouldn’t be able to do that, so I just cut as best as I could and took out larger chunks, eventually getting to a comfortable stopping point.
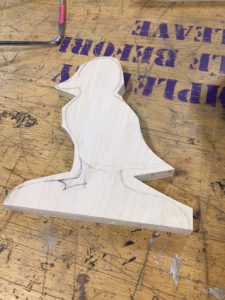
Coping saws are super nifty, but very time consuming. At this point, I clamped my piece to a work table and started to saw away at the curves that were left (and my podcast backlog). When I was finished I realized I had enough leftover wood to make a penguin my nephew could push, so I started on that as well. Two presents are better than one, aye?
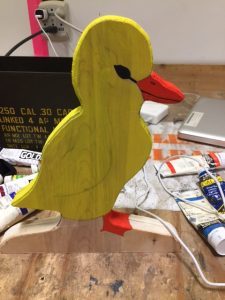
Next I worked on the base. This was a pretty simple cut with the bandsaw, and a friend at the space assisted in helping me etch a spot using the laser cutter so that the duck would sit a bit in the base rather than simply plopped on top. We did etch a rectangle on top just to make sure things were square, and then I took any excess off with another pass in the bandsaw. I took both pieces to the router and started to smooth down the edges because maiming children with a toy is not on my list of things to do in life. I then started painting. And then immediately stopped after the first layer because the routed edges were still scratchy in spaces so I nabbed some sandpaper from the tool crib and sanded away after the first layer was dry.
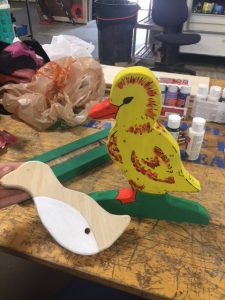
Back to painting! In this image you can see the base, the almost completely painted duck, and the partially painted penguin. I used a combination of artist grade acrylic and standard craft paint from Michael’s.
The hole is a result of being trained on the drill press. It had been years since I’d operated one, so another member was wonderful and gave me a refresher course. I drilled holes where the axels made of dowel rods would eventually go, and then cleaned them out and smoothed them with a combination of a rounded file and 120 grit sandpaper. Then I moved on to the wheels, which was by far my longest day yet of working on this.
The last time I’d seriously used the laser cutter at i3 for a project was two years ago, so I spent some quality time on the i3 wiki and with the software reacquainting myself (and getting frustrated) until I could make wheels. Again, I needed some heft, so each wheel was comprised of three 1/4″ circles. I glued them together and then waited for them to dry, and listened to some more podcasting goodness. At the same time the duck was glued into the base and zip ties were used as a clamp on either side.
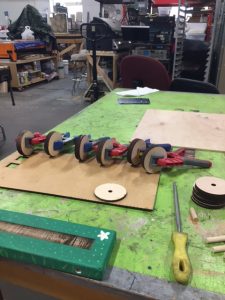
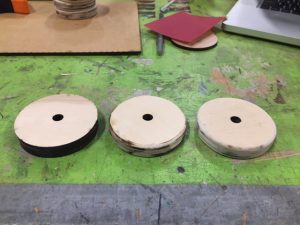
When everything was dry, the belt sander helped make sure everything was fairly consistent, and then each wheel was routed and hand sanded with a fine grit piece of sandpaper. To see the difference, the picture below shows the progression: stacked, routed, routed and sanded.
Some smaller circles were also laser cut to go on either side of the wheel so that the wouldn’t fall off the axel and to allow for wheel movement. In this design I made the axels stationary, and before assembly I painted all of the wheels. Two wheels had notches cut into them using the band saw so I could place in small floppy leather feet for my penguin.
Nontoxic shellac was used to seal all of the paint in and to protect it from the elements. I found the Zinsser Bulls Eye brand and bought an aerosol can. While the fumes aren’t great to inhale, once everything is dry it is nontoxic. The only downside of being in a hackerspace is that there’s a LOT of dust around, and even though I sprayed outside some dust bits still found their way into the shellac. I’m just going to say the dust adds rustic charm. Once everything was coated and ready to go, all parts were assembled and finishing touches were made.
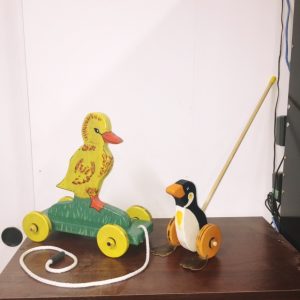
I’m really pleased with my first foray into the woodshop, and I’m looking forward to utilizing this part of i3 more frequently.
Thanks for reading!
Sam