Glass Kasting with the i3 Kiln
The Glass Kiln (Kiln#1) is up and operational at i3 Detroit. This is the first piece made with the equipment.
The Glass Kiln is used for working with glass in most techniques, such as fusing, slumping, pate de verre, and in this example glass casting.
Glass casting is exactly what it sounds like. A mold is made, either reusable or one-time mold. In our example this is a box made with two re-usable ceramic molds, which were made by Colour de Verre, who makes the best glass casting molds in the US.

Step 1 Kiln Wash the Molds
Kiln Wash is simply the name used for a mold release agent in the kiln world. Kiln wash is normally coated on all interior floor surfaces of the kiln, so any splash doesn’t stick to the kiln surfaces. In our case we coat the new molds with two coats of a new-school kiln wash…boron nitride(MR97). Boron nitride is a spray that fills the pores in the ceramic mold and makes the glass release very easily. 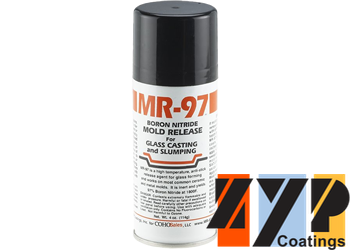 But once Boron Nitride is used on a mold, you can’t go back to other types of kiln wash. Spraying on MR97 to your mold must be done outside with a mask, or your lungs will get that smooth mold release finish. If the mold has been used previously, then clean the mold (outside with a mask and a scrubbrush) and use 1 coat of MR97.
Step 2 Selecting out Glass
I am using multiple colors of glass for my work. When glass molding, I need to use glasses that have the same Coefficient of Expansion, else as the piece cools from the kiln, the different glasses will contract at a different rate causing cracking and destruction of the piece. For this piece I am using System 96 glass frit, which has a coefficient of expansion of 96.
Frit is simply the name for glass fragments. They come in multiple colors, including clear, and 4 particle sizes (Coarse, Medium, Fine, Powder).
Step 3 Filling the Mold with Glass
I am making a round glass box. There are two molds for this piece. The mold for the box and the mold for the lid. I fill the box mold with 295 grams total of our frit, the lid 115 grams. For this piece I use 60% Marine Blue Powder, 30% Clear Powder, 7% White Powder, and 3% Black Fine. I mix the clear and blue into a homogenous mixture prior to pouring into the mold. I add the white and black in striation patterns, using the spoon to create patterns. I try to mound the glass in the center of the mold, away from the edges so that as it melts it flows from the center to the edge, creating a smooth edge. If I level the frit, as it melts and condenses it will coat the outside walls and leave “spars” of glass that will need to be sanded away.
Handling Powder Glass Frit Safely:
- Always use a mask.
- Use in well vented areas.
- Use away from other members.
- Try to keep dust down.
- Wipe all surfaces with damp paper towel when done.
Take the two molds, when full and place them on a slumping dish which has been kilnwashed for spills and place them into the Kiln.
Step 5 Firing Up the Kiln
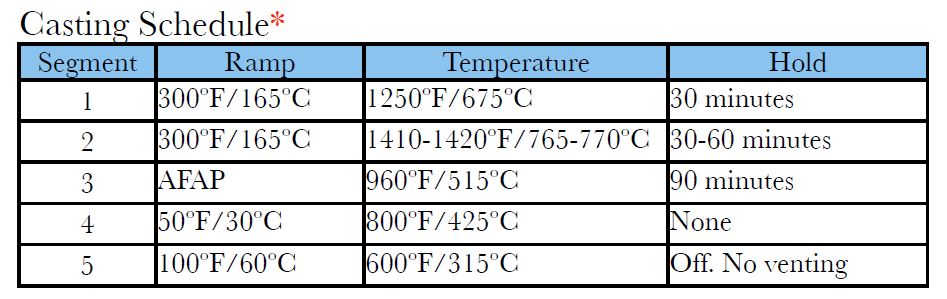
The programmable controller allows the kiln to be programmed for rising and falling to specific temperatures at specific rates. This is called the Firing Schedule. Enter your schedule into the programmable controller by the front panel buttons. It is tedious, but it allows for up to a 64 step firing schedule. I will use a 10 step schedule which lasts just under 24 hours. It will melt the glass and then anneal it to reduce stresses and keep the piece strong. It does so by bring the temperature down in slow steps with long pauses at certain temperatures.
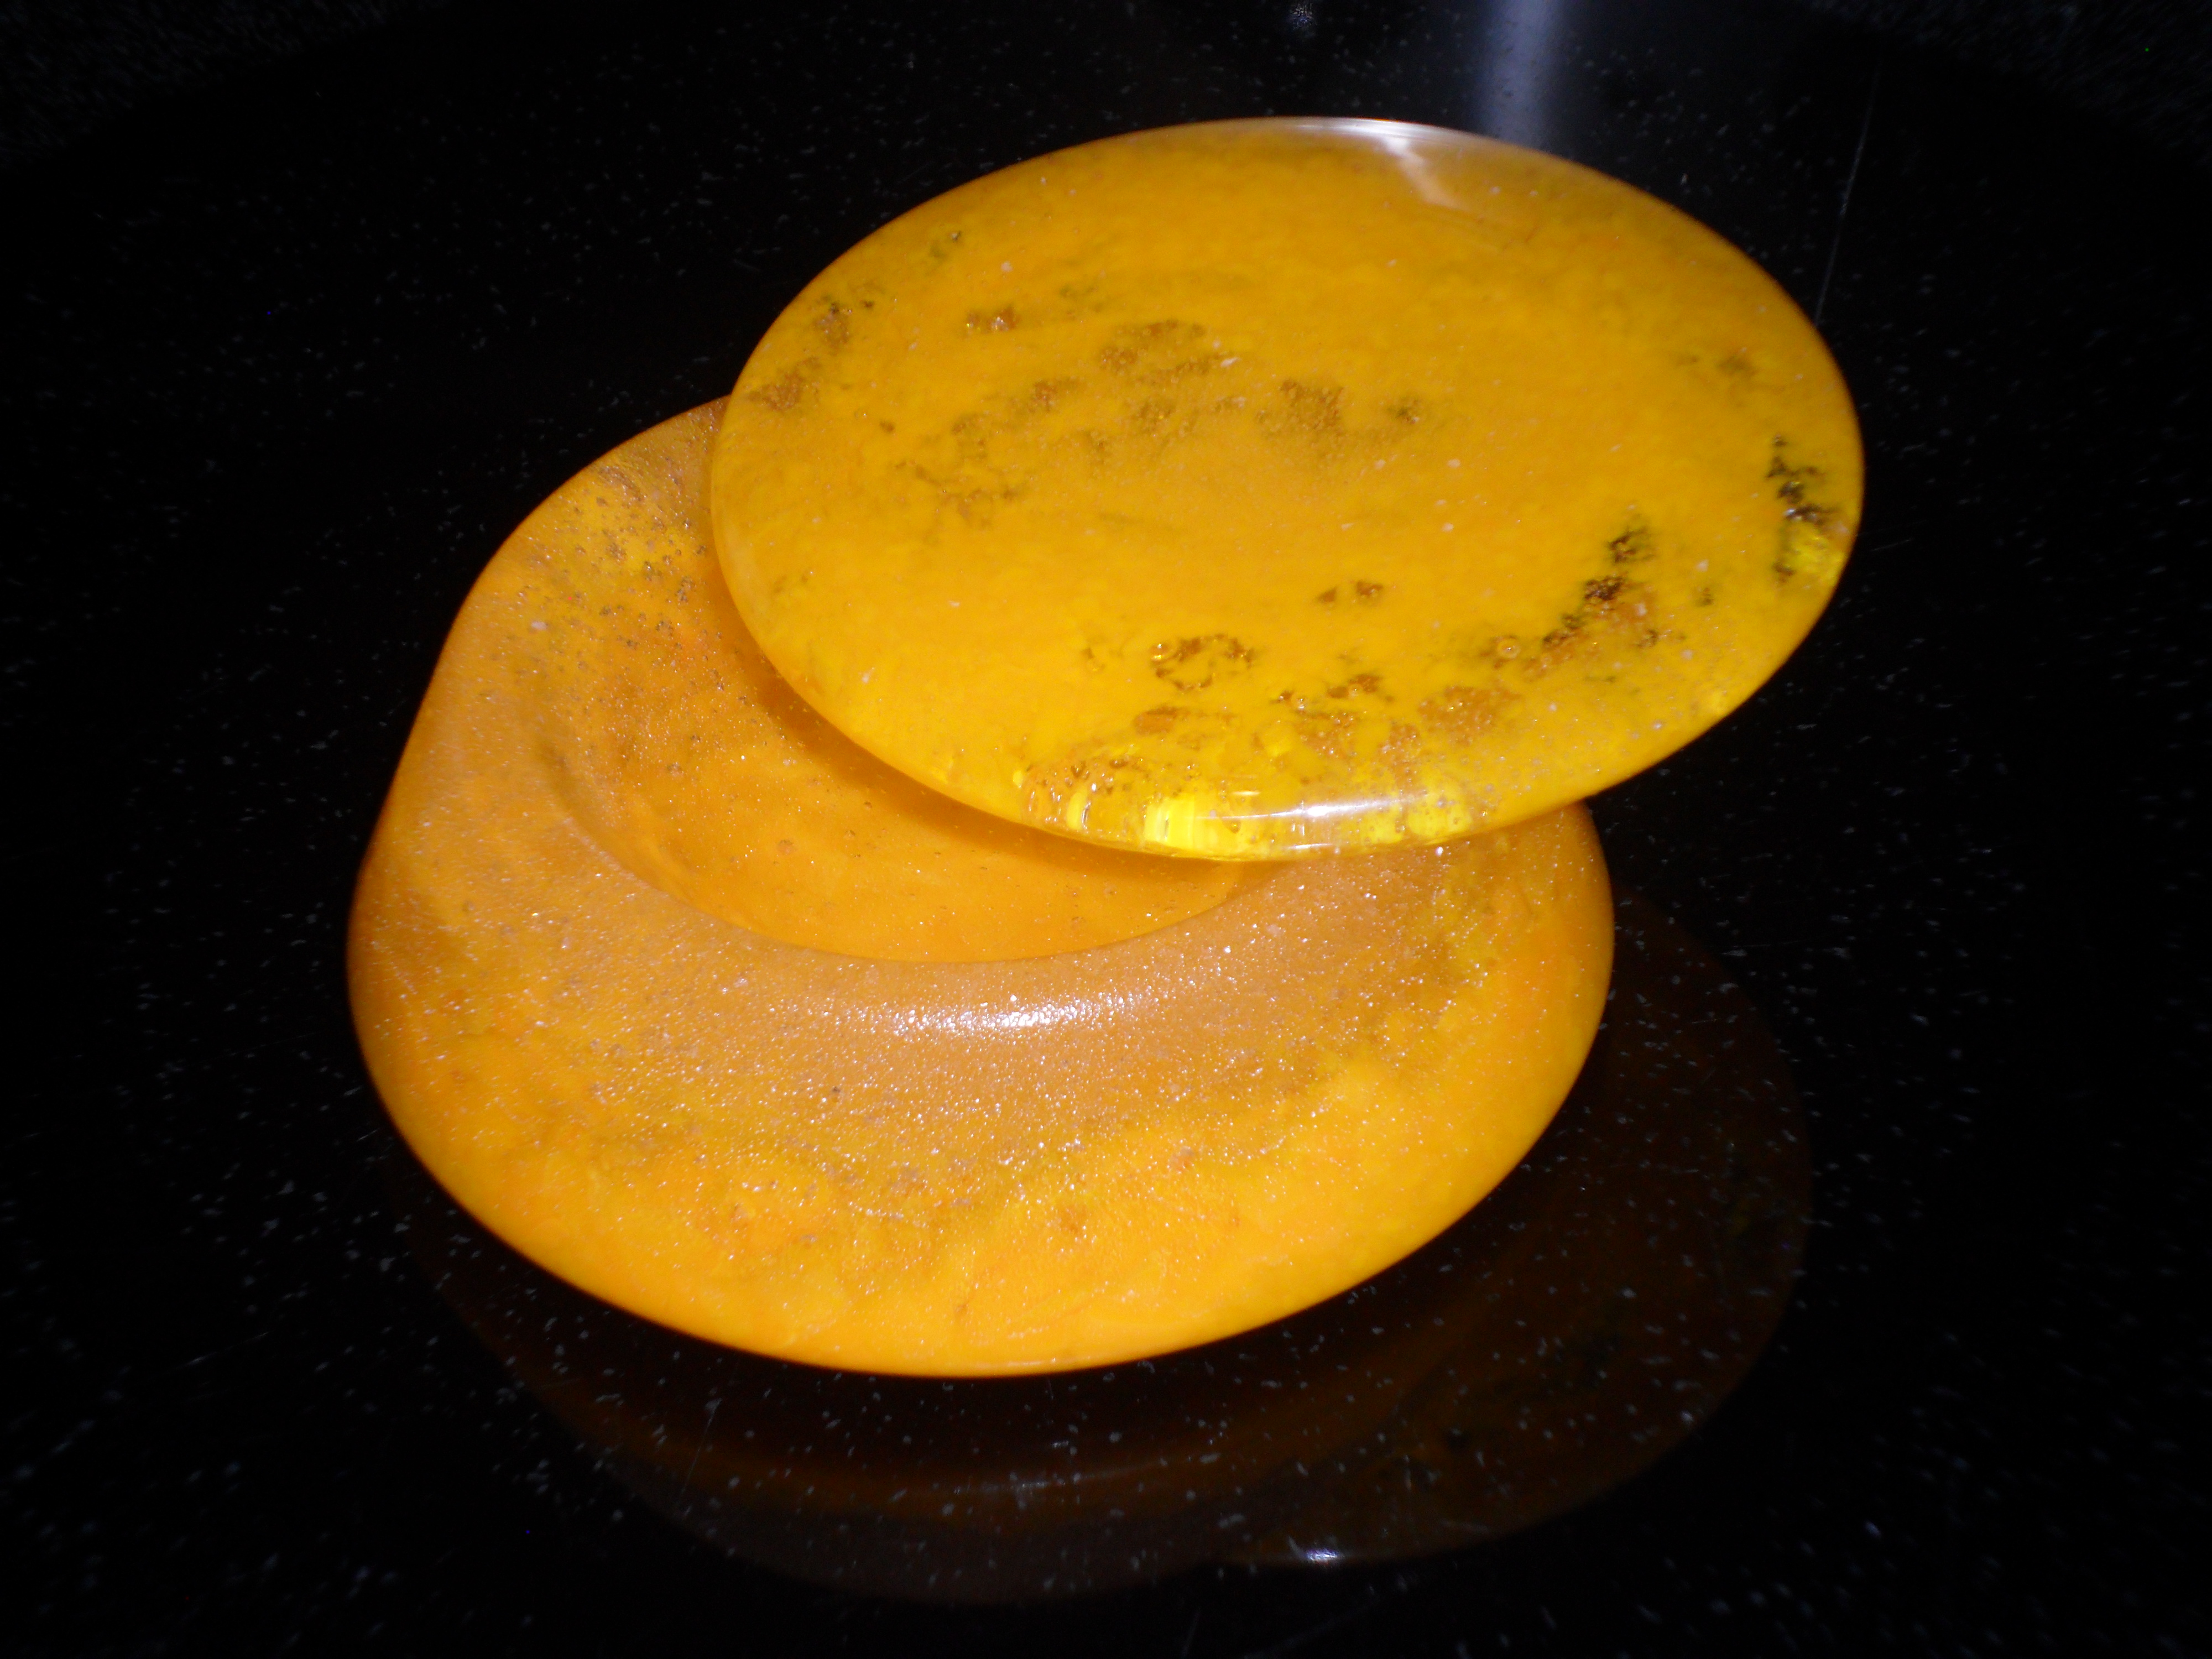
Step 6 Remove Piece
Take the piece out of the kiln. Wash it off and touch sand as necessary. Voila.
Leave a Reply
Want to join the discussion?Feel free to contribute!