Flight Sim APU Panel
Overview
Realistic flight simulator cockpits is a "cult" hobby worldwide. For some serious simmers, a keyboard, mouse, and joystick just isn't enough.
The execution of a home simulator build varies based on the individuals want's, ranging from extreme hybrid panels that resemble no real aircraft but do all the things needed, to exact replicas of every inch of the flight deck.
(It should be noted that the terms "cockpit" and "flight deck" are interchangeable. Technically "cockpit" is more correct for a fighter jet, and "flight deck" is more proper for commercial airliners, but the difference is rarely noted in practice.)
Because I personally value realism, I'm starting small in scale but high in detail. Many of the flight deck panels are a modular "DZUS" system, so I am starting with one simple module and building it out to full completion.
This module is the APU Start panel for the Bombardier CRJ-700. I selected the CRJ because it is a regional jet, which means the cabin size is less than 9" wide, which is good for space considerations, it is fairly simple, and it has many elements people expect to see in a flight deck. I really wanted to do the new Bombardier C100 but it is so ultra-modern people may not feel like they're in a normal cockpit, and replicating the glass panel displays may be challenging.
Process
I started with looking at pictures of the APU panel. This resulted in digging into a lot of research on the standard aviation panel rack system, informally called the Dzus system because it uses a type of Dzus stud and rail system. Thanks to some <ref>great documentation by Hessel Oosten</ref>, I was able to understand the basic patterns of this system.
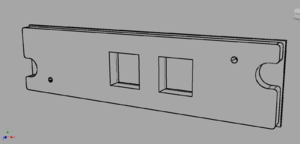
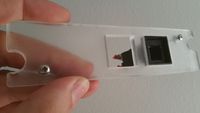
By understanding the mounting system, I could figure out the height of the panel (4 Dzus spaces). Knowing those dimensions, I was able to draw the face panel to exact dimensions. I then exported that face and cut it from 1/4" acrylic on the laser cutter.
The initial cut was made with the wrong button size, because that was the only large square button sitting around the shop. I have since purchased smaller buttons that are closer to the proper size, and will cut a new face to the new button dimensions.
Next step is to wire the new buttons to my Arduino Mega, figure out how to put two seperately controlled LEDs in each button, cut and mount the aluminum back panel, and order the Dzus fasteners and rail.

